Showing posts with label pink. Show all posts

Monday, December 15, 2014

Glinda the Good Witch! Nail Art Part II

Hey everybun!
One of my most popular post seems to be this one, from over a year ago with some Wizard of Oz nail art. I did some Glinda the Good Witch nails, and looking back, I feel that my nail art skills have improved vastly, and so has my photography. 
For the funs of it, I decided to recreate this look to compare the two!


Thursday, August 21, 2014

Leesha's Lacquer Repin Rewind French Studs

Hey everybun!
It's been a crazy week dealing with preps for college (which starts on Monday D: ) and doing everything I can (like staying up late with my friends) before I have to get back in the groove of things.
For now, my posts may be a little less often but I vow that I've not forgotten about all of you's.
The nails I'm going to show you today are the beauties that I wore to the pow wow. Ready for awesomeness?!


Bam! These are super shiny sparklers. I used pink as my base on my thumb and ring and Repin Rewind on its own on the rest of my fingers.


These were a huge hit with my family up north, and I hope you all will love them just as much! 
I'm writing this on mobile blogger, so I'll come back later to patch up the odd formatting. 
I'll see you all soon!
- Love from, Leesha's Lacquer


Monday, July 14, 2014

KKCenterhk Review - N.NAIL Star Neon Pink 2mm Studs

*product sent to me to review in exchange for my honest opinion

Hey there, everybun. 
I totally KILLED it at the Craft Show on Saturday and made some connections with others that I hope will get my business growing even more.
I had tons of fun but I only got one picture of my booth that I'll post at the end.

Continuing my "good blogger" streak, I have for you today a stellar (haha!) review of some star studs from KKCenterhk. I've reviewed studs like these in the past, and now I want all the colors because they're so fun to use!
Shooting stars, anyone?


Yes, that's right, in all of my super creative creativity I've come up with these cute little shooting stars.
These are 2mm Star Studs, which were perfect for this design that I did with striping tape.


Click on to see my review!

Monday, May 19, 2014

China Glaze - Put a Bow on it Swatch and Review

Happy Monday, everybun!
I am, once again, so freakin' happy to be here. It's like a whole new world has been opened up to me once again!
Are you all as excited as I am to feast your eyes on this pretty little swatchy of China Glaze, that has been staring me in the eye, sitting and waiting on the shelf behind my toilet day in and day out. Finally, just the other day as I was taking a bath and doing my acrylics (yeah, okay, it might not be a good idea to do that with the water and acrylic powder and all. But I'm very Pro..sort of..Okay, I'm smart enough to not flail around and get chemicals everywhere!), I look up and realize, hot damn, I forgot to grab some polish! Guess who was staring me straight in the eye? This little pretty! :


I actually wasn't even sure if she was a full coverage glitter, I just put her on, prayed, and 3 coats later we were golden! In the picture is 3 days of wear, which you can see a bit on the tips but other than that I had no issues with formula etc. She was a bit gritty and matte-ish but all was fixed with a nice helping of Seche Vite.
Put a Bow on it is one of those in your face glitters than caused me to have PLS (Polish Looking Syndrome). You know when you have a color on, and it's so pretty, you keep sneaking glances at it in different lights whenever you can? PLS! As in PLS get me some more of this polish..*generic laugh track*
Really folks, I'm here ALL NIGHT!

Terrible jokes aside, I have found a true winner in this glittery glory, 5/5 would recommend to a friend!


Friday, May 16, 2014

Look what the CAT dragged in!

HELLO EVERYBUN WOOO
WOO WOO WOOOOO!
I'm back!
Can you tell I'm excited? BECAUSE I AM! It sucked to look longingly at the blog, knowing that it was on hold but I was so super busy! Now that college is over for the semester and I don't have to worry about anything til next semester, which is fall, I have my shop and my blog to keep me company.
So on to the mani!
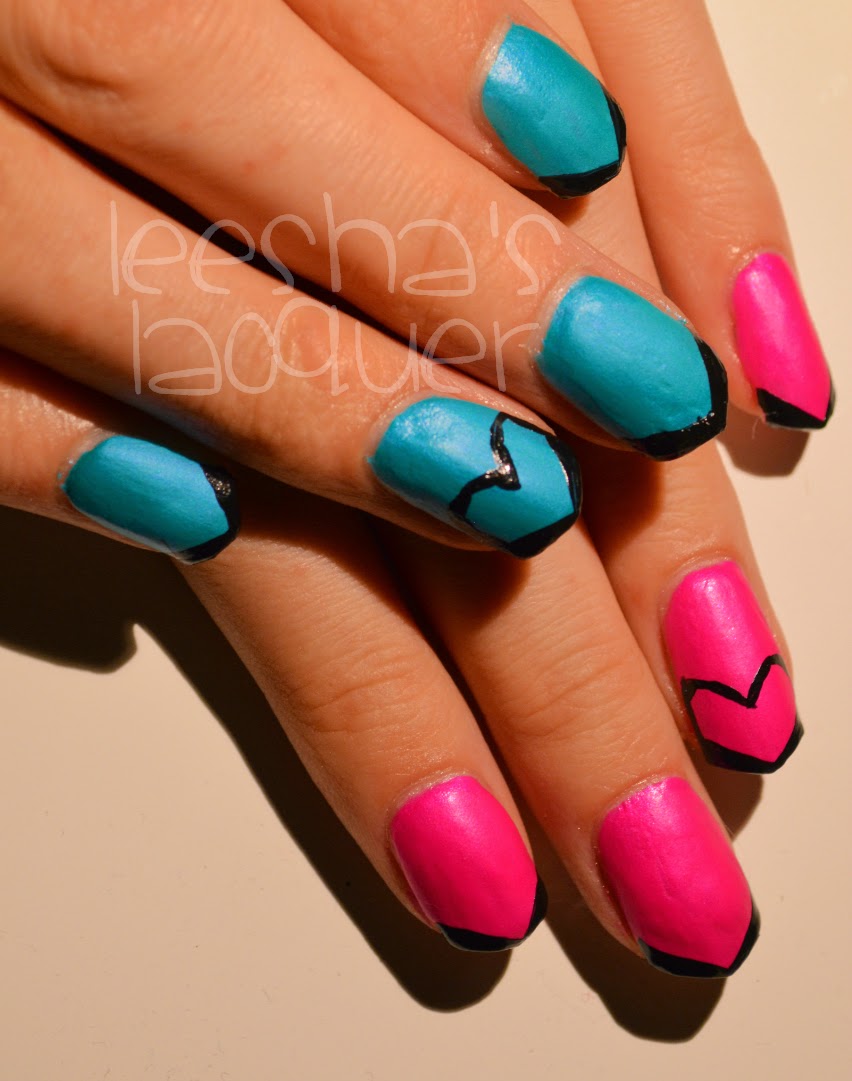
I have been LOVING my new nail shape and figured I'd incorporate it into my first design back and this is what I came up with.


I used Salon Perfect in Fired Up Fuchsia and Bermuda Baby which were my first experiences with Salon Perfect. I LOVED the formula. Can you believe this is only 2 coats and on some nails it was opaque in just one coat?! Not to mention dat satin finish, tho! I loved the finishes so much I didn't even add top coat. The black was done with an I heart nail art pen by Sally Hansen in Black.Which, by the way, almost caused me to flip a table and punch a large mammal, because halfway through the ol' nail art process it began to goop up like nobodies business. I gave it a little shake, cursed, and added some thinning drops. Whether it was the cursing or the thinning drops (the world may never know) I was able to persevere, and finish the design on my right hand, albeit a bit sloppier a la my middle finger.

Over all, everything turned out super fantastical and awesome and I wore this design for a week..Not because I really REALLY liked it but to be honest, I was just really, really lazy and the design turned out decent enough to show off to the world.

So ladies and the occasional fabulous male, how have your nail art adventures been? Anything cool or different happen lately?
See you all Monday, loves!


Friday, March 21, 2014

Fun with Floral

Happy, Happy Friday everyone! 
It's been nice being around the blog this week, and I have more nail art for you today!
I've been having fun with floral this week and when stumped for an idea of nail art, I thought why not keep on with the trend?


My favorite nails are my pointer and ring. I love the way the branchy things look!
As you can see I used Maybelline - Audacious Asphalt as my base, and acrylic paint for the rest.
Have a flowery and fun Friday!


Wednesday, March 19, 2014

KKCenterhk Review - Nail Pearls

*This product was sent to me for review in exchange for my honest opinion

Hey everybun, I have a long overdue review of these awesome little nail pearls from KKCenterhk, so let's get right into it!


These little lovlies, which you can find here, are 3mm and come in a variety of colors in a little pot like you see above. You will get about 100 pieces which is more than enough, because if you're careful enough you can reuse them!
Here is the look I created with them :


I used Seche Top coat to attach these buggers and the stay power was awesome! I was able to wear these for a full day before I started to pick at them. The ones that I didn't pick at, stayed until I removed them 3 days later. 

These are such a cool addition to my nail art collection because I really didn't have anything like them!

These will run you $4.50 plus shipping for a pot like you see far above.

I have another item that will be making an appearance on the blog next week from KKCenterhk (woo nail foils!)

See you all Friday!

Click HERE to be taken to their site!

Use code : LeeshasLacquer
for 10% off your total purchase!


Wednesday, February 26, 2014

Orly - Rococo A Go Go Swatch

Hey everyone!
Here I am, As promised! I have a swatch for you today, of this polish that has been sitting, neglected, in my sad little unposted folder for longer than it should have been.


I would say that this is a berry based polish with some super sick gold flakies in it. I've seen other swatches that range from purple/berry to pink/red, and for me, comparing these images to the bottle, I'd say that it's pretty accurate. I guess it all depends on which lighting you photograph this in, which shows how dynamic it can be!
I loved this polish. Smooth and good to go in 2 coats, all of the shimmery,flakie goodness and the color change! 

See you all again Friday!


Wednesday, February 19, 2014

Simple Half Moon Nail art with a twist!

Hey all! 
I was stumped with what to do today, but had a last minute spur of creativity!
This is a half moon mani with a twist!


I started out with my base color, Square Hue - Shibuya then used my Sally Hansen I <3 Nail Art Black striper to make the spikeys.
This was incredibly simple and adds quite a bit of pizzazz to the typical half moon nail art.
I love it so much I'm going to keep it until Friday, when I have to do another post!
Happy Humpday!


Friday, February 7, 2014

Valentines Day Mani #2 - Before and After

Hello all!
I've had a multitude of doctors appointments this week so I'm so sorry for the lack of posting.In other news, I had something set up with one of those deal websites and they completely and utterly cancelled on me, saying that they no longer sell beauty products, such as nail polish, because they had other problems with it in the past. Now these people literally just contacted me on the 15th of January. They didn't bother at all to tell me, after I bought over $200 in mini polish bottles and supplies, that they no longer wished to sell my product. I had to contact THEM and even then, they stopped responding to my emails after I told them that I put hours of effort and lots of money into creating mini grab bags that they requested from ME.
Ugh! I was so upset when this happened, I just made a whole new set of polishes I was so angry!
I guess I'm just left with 300 bottles of minis..I'll figure something cool out to do with them though.
Anyways, here's something a little bit more happy for you, some valentines day nail art WITH a before that I did when I first started my blog and after! 


Pinks I used: China Glaze : Passion for Petals, Sinful Colors : Outrages, Dream On and Island Coral
Base color : Zoya : Storm
I think my first attempt is an absolute FAIL but I really like how it came out this time around. I'll have one more before and after valentines day nail art before the valentines grand finale!
Have a happy, happy Friday ya'll!


Wednesday, January 29, 2014

Valentines Day Mani #1

Hello everybun! 
Are you prepared for the torrential downpour of valentines day mani's that are sure to plague your blog roll? I know I am! I have so many ideas for valentines mani's and this one came to me last night right before I fell asleep. Whether you celebrate the day o' love or not, I hope you can still appreciate some good ol' lovey dovey nail art. 


These little love birds were done with all acrylic paint. I have so many valentines day contests I want to enter, but I'd like to feel the love a bit more by doing a few more lovey dovey mani's before I decide whether these two make the cut or not.
Speaking of Valentines day..and the super bowl for that matter, I do so recall that my first blog posts were superbowl and valentines day themed AND THAT MEANS MY FIRST YEAR BLOGIVERSARY IS COMING UP!
More on that later..
For now, enjoy the lurve!


Friday, January 3, 2014

The Polish Diva Guest Post #4


Hey guys! I am happy to be a guest post for Leesha’s Lacquers today! I love her brand and her polishes and when she contacted me about doing a guest post for her blog while she was on vacation, I was excited!

Today I have decided to show you guys a really pretty polish that I swatched as part of a larger post for my blog. It is so pretty in my eyes, I thought you guys should see it by itself!

This is LA Colors Caribbean Pink! This is a sheer, shimmery light pink polish with a little bit of duochrome-ness to it. I did three coats for this swatch.


It goes on nicely and finishes to a semi-matte, semi-glossy finish. I just love the look of this color a lot, it is just soft and pretty.

LA Colors retails for $1 in dollar stores and $1.29 in drugstores and super stores, and around here in Hawaii it is $1.49/$1.69.

Well, I hope you guys enjoyed my short little post and the swatch and maybe it will make you want to purchase this polish. If you do, please show me on my Facebook page: http://www.facebook.com/thepolishdiva, or even just here in comments which I am sure Leesha won’t mind seeing herself!


Monday, December 30, 2013

Rambles of a Polish Addict Guest Post #2


Hi y'all! I'm Katherine from over at Rambles of a Polish Addict and Leesha asked me recently if I could do a guest post for her while she was away on vacation, and I came up with this fun dream catch nail art for you. Leesha reached out to me recently when my bunny passed away (sad face) and sent me a custom polish in Foofy's honor, which I've included in this mani as well.


For this look I used Sinful Colors Hazard as the base color. And two coats of the polish Leesha sent me on the ring finger for an accent. Just two coats and the glitter was nearly fully overing the base color, it's a total glitter bomb! Packed sooo full with all that glitter and it all looks so pretty on the nail, I love it.


For the rest of the details I did them all with acrylic paints in various colors and a tiny little detail nail art brush. It took me a while to think of something when Leesha asked if I'd like to do a guest post, of course I said yes right away, but then thinking of what to do.. that was harder. But then I thought of something I've been wanting to do for a while and never could find a reason to. And I also wanted to be sure it would be something different than what's been on my own blog lately, and since I've never done dream catchers and have been wanting to, it was perfect!


So I hope you all enjoy themeven if they were more bright and summery than necessary for these winter months.

If you'd like to see more of Katherines beautiful nail arts be sure to check out her blog
Rambles of a Polish Addict

Wednesday, December 11, 2013

Color Blocking

Look who's back! Its me!
I had finals all of last week and I still have a few left to go this week. I couldn't even think about doing any nail art with all of my studying going on, but now things are winding down and I'm back into the swing of things.
I have some color blocking nail art that was completely unplanned and sort of made up as I went along , but it came out cute in the end, so all is well that ends well, right?


I have a ton of nail art plans in my mind and Ill be pouring them out to make up for lost time!
See you all soon!

Friday, August 23, 2013

Half a' Fishtail

Hello Everybun!

Happy, Happy Friday!
I'm at it, Night Blogging again!
Today I have a bit of a flashback. Remember this? Well I up and decided to recreate this again except this time I only did half a fishtail. (A bit lazy of me, no?)


As you may have suspected, I'm really lazy and have no intentions of running around like a chicken with my head cut off trying to gather together the colors. However If anyone would like to know a specific color I'd be happy to go find it. Tomorrow. When I'm not so tired (Thank you Allergies and Thank you Benadryl!)

See you all for a much needed edition of Sunday Bunday!


Wednesday, August 7, 2013

Troves of Triangles

Hey everybun.

Happy Wednesday!

I wasn't going to originally do nail arts for today, I was just going to do a swatch for Zoya - Jacqueline. Until I grabbed a paint brush and whipped out my acrylic paint. THAT,my friends, is how random nail arts happen.


Triangles! Yes, it really is a trove of triangles. I used a tiny striper brush and just kind of went at it with the triangles in acrylic paint.


 And here is the swatch of Jacqueline that started it all! 


Jacqueline is a pretty little nude cream. Above is 3 coats with Seche top coat. Come to think of it, I remember getting that little nick on my middle finger and that's the reason for the nail arts, because I was sad of the nick!

I'll be back Friday with possibly more nail arts...I haven't decided yet..Okay yeah, more nail arts!


Friday, July 5, 2013

Ellagee - Beam Me Up

Hello everybun!

Today I have my final review of the Ellagee polishes that I was sent. You can check out my other reviews here and here.

*Beam Me Up is a sheer gold top coat inspired by, of course, the Star Trek series. Again, you can find her offishal description here.


I wasn't sure what color to use as an undie so I picked whatever!
The Blue is an unamed Claire's
the Green is an unamed Color Club
 the White is Sinful colors - Snow Me White
and
 the pink is Sinful Colors - Island Coral

of course the top coat is Beam Me Up


As a top coat this is gorgeous. Application was smooth and of course it's beautiful just like the rest of the collection.

You can find Ellagee polishes HERE

Thank you to Laura for sending me these polishes to review!


*This polish was sent to me to review in exchange for my honest opinion.